
Last Updated on November 23, 2023 by Madelein Wolfaardt

As you all know. Stock control is crucial for any business and stock take is part of it.
There are different ways of doing a stock take from manual counting to using scanners.
In this article, we will look at basic steps on how to do it in Smart iT.
Step 1:
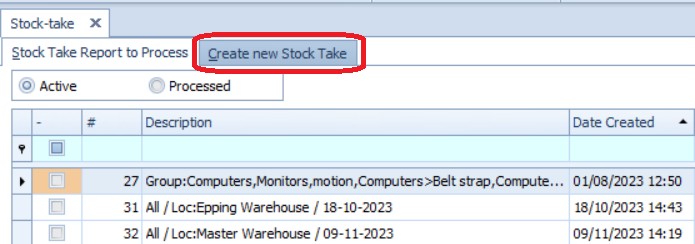
Go to Stock Items > Stock take > Regular Stock take.
(Regular stock take is for doing a full stock take or a specific inventory group, supplier, bin location, or warehouse. Whereas the instant stock is used for doing spot checks and correcting stock at that moment.)
Step 2:
Click on the “Create new stock take” tab.
Step 3:
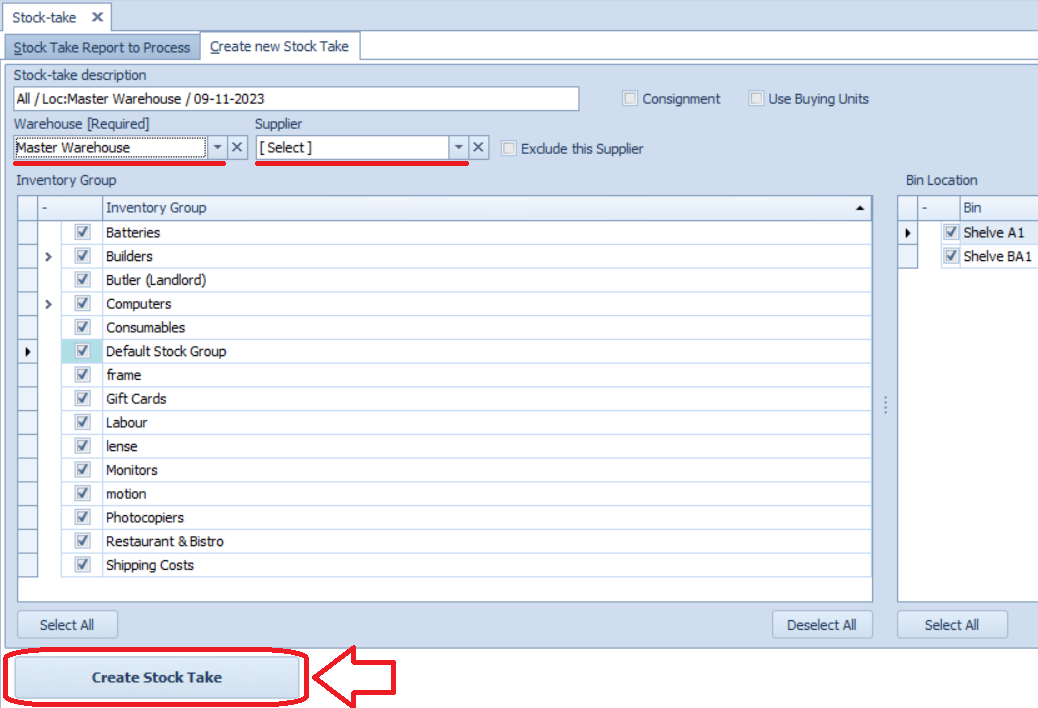
Here you have various options.
As mentioned you can do a full stock take or by a specific inventory group, supplier, bin location, or warehouse.
In this scenario, we will do a full stock take of everything.
– Click on “Create stock take”.
Step 4:
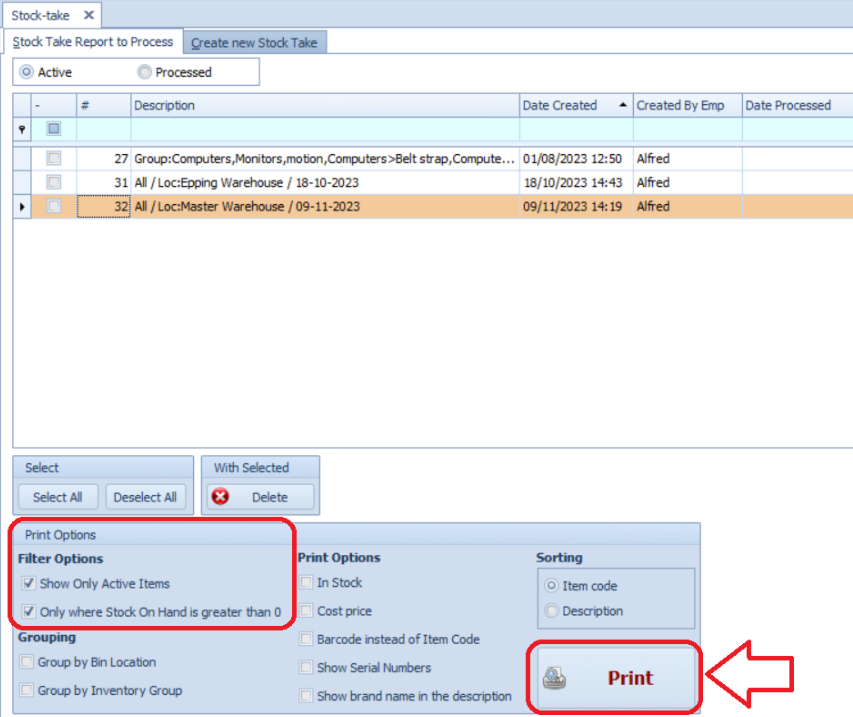
Smart iT will take you back to the original form after clicking on “create stock take”.
On this form you can print out the stock take for someone to do the physical count.
You will see various “Print Options” that you can tick before printing.
We recommend selecting the following:
– Show only active items
– Only print where stock on hand is greater than 0
Click on print after making your selection.
Step 5:
Next, we want to enter that on-hand value that was counted.
Right-click on the stock take that you created and select “Open Stock Take.”
(You will also see an option for “Sectioned Stock Take Count”, scroll down for an explanation.)
Step 6:
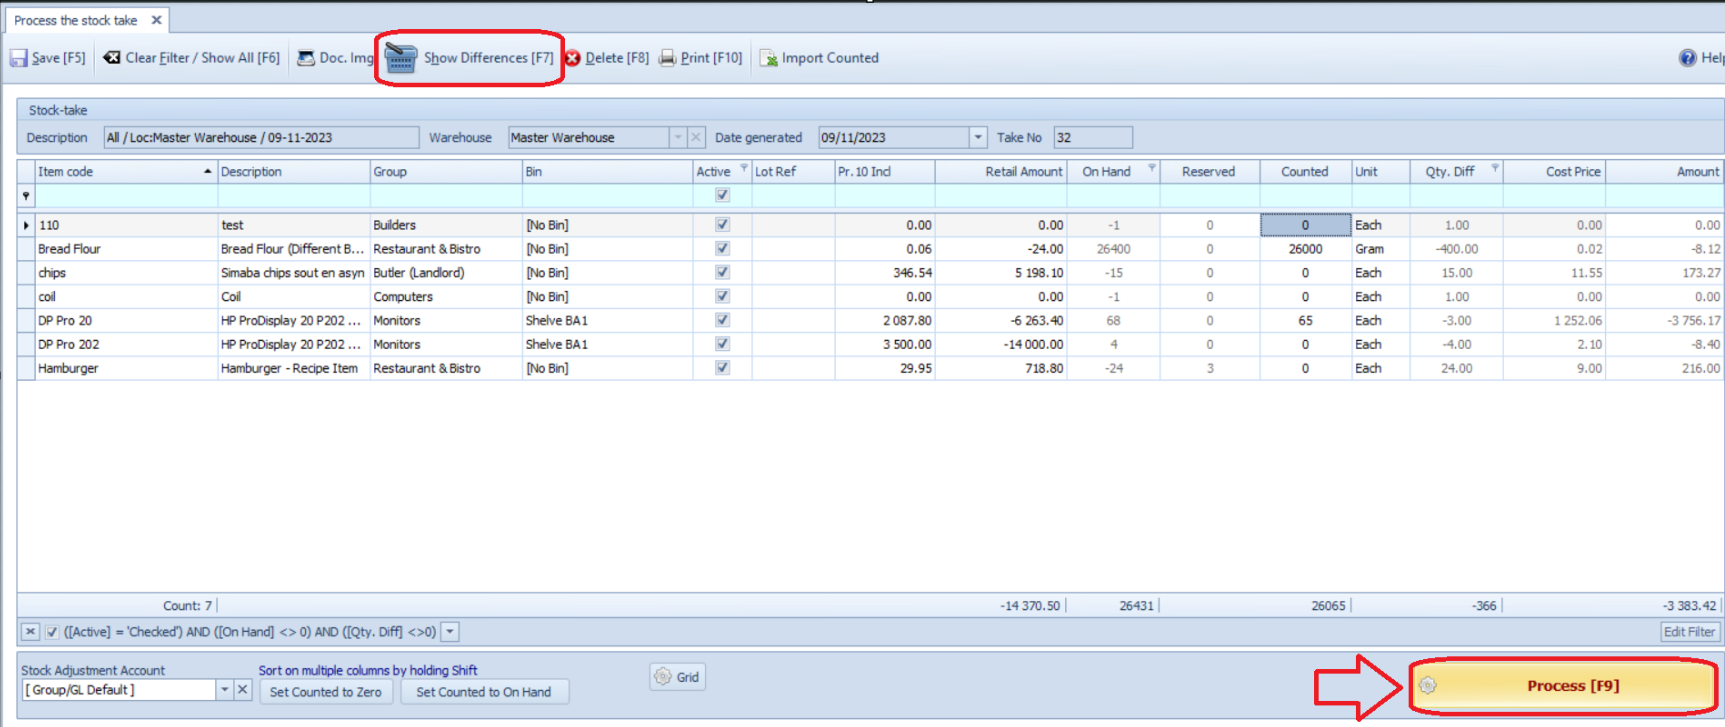
You will see a column named “counted”. We will use this column to enter the value that was counted. By default, the current stock on-hand value will be in this column. We want to change this to zero. This will ensure that anything not counted will default to zero stock on hand and will appear on the variance report.
– To do this click on “Set counted to Zero” at the bottom of the page.
– Next, you want to enter the value that you counted into the counted column.

Step 7:
Click on “Differences.”
This will show all the differences between the current stock on hand and what has been counted.
You can double-check these items and recount if you are unsure.
If you are happy with the differences then you can go ahead and click on “Process.“
This concludes doing a regular stock take.
Important notice when doing a stock take:
We recommend shutting the doors when doing a stock take because trading while doing stock will make it very difficult for an accurate count.
Section Stock Take
The section stock take goes hand in hand with our stock take app, where you can use a PDT device (portable data terminal) to scan the items. See our YouTube video for more info regarding the APP. https://www.youtube.com/watch?v=j0c9567JmlY&t=2s
The idea of the sectioned stock take is to divide your store into different sections and divide the stock take. You can then use multiple PDT devices to do the count. Each employee takes a different section to count by scanning the items with the PDT device.
Smart iT will automatically count together all the sections to give you a full count of the store.
Follow steps 1 – 5:
Step 5: Right-click on the stock take that you created but now click on “sectioned stock take count.”
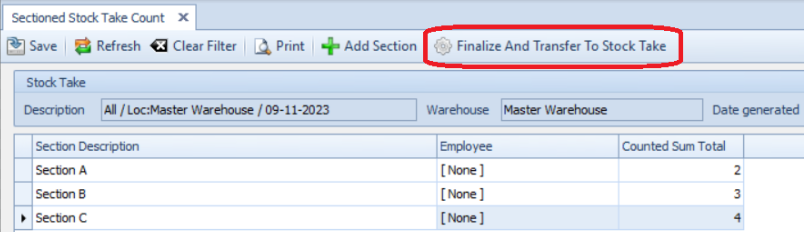
Step 6:
Add your different sections of how you want to divide your store.
For example, sections A, B, and C.
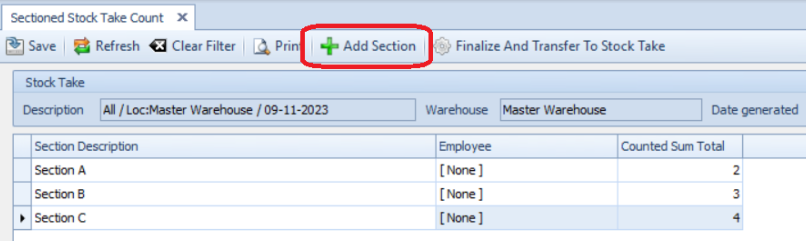
Step 7:
Use the scanners to do the count.
After scanning the items.
– Click on Finalize and transfer to Stock Take.
Please remember that this is a basic tutorial and if you have more questions then you are welcome to phone the office for more support.